LICORbio Atlas Imager Quick Start Guide
Before You Begin
Complete these steps before imaging a sample on the LICORbio Atlas Imager.
-
Clean the glass Scan Surface with ultrapure water and lint-free tissue. Do not spray liquid directly on the glass.
-
If smears remain, clean the glass with 70% ethanol.
-
Use methanol only to remove remaining residue.
-
-
Do not use blue wipes, acetone, or abrasive tools.
-
Clean the bottom of slides before imaging.
-
If artifacts are present in the image, clean the bottom of the plate with a moist, lint-free tissue.
Membranes
Sample Preparation
-
Remove excess liquid to prevent the membrane from floating.
-
Place the membrane sample-side down, facing the Scan Surface.
-
Remove all bubbles.
-
Cover wet or dry fluorescent membranes completely with the silicone mat.
If you are scanning multiple blots, place the silicone mat on the blots to prevent them from drying.
Image Studio™ Software Workflow

-
Select the Membrane preset.
-
Select the imaging channels.
-
Under Focus Offset, select Single Focus and set the focus to 0.000 mm.
-
Adjust the existing scan area or draw a new scan area that encompasses the membrane.
-
Start the scan.
Protein & DNA Gels
Sample Preparation
-
Rinse or destain the gel.
-
Lay the gel flat on the Scan Surface, face-up with the front of the gel toward you.
-
Remove all bubbles.
Image Studio™ Software Workflow
-
Select the Protein Gel or DNA Gel preset.
-
Select the imaging channels.
-
Set Single Focus to half the gel thickness.
-
Adjust the existing scan area or draw a new scan area that encompasses the gel.
-
Start the scan.
Microscope Slides
Place Slides in the
-
For a slide with a coverslip (preferred), place the slide sample-side up.
-
For a dry slide without a coverslip, place the slide sample-side down.
-
Load slides into the while it is on the benchtop. Then place the guide on the instrument.

1. Angle

2. Lower

3. Seat flat
Image Studio™ Software Workflow
Sample Up (Slides with a Coverslip)
-
Select the Slides (Sample Up) preset.
-
Select the imaging channels.
-
Start the scan.
Sample Down
-
Select the Slides (Sample Down) preset.
-
Select the imaging channels.
-
Start the scan.
Multiwell Plates with 2D Cell Culture
Sample Preparation
-
Insert the Plate Alignment Guide with its tabs facing the front of the instrument.
-
Place each plate in one of the four guide positions.
-
Place luminescent assays in Position 1.
-
Ensure that each plate is fully seated and flat on all four corners in the Plate Alignment Guide.
-
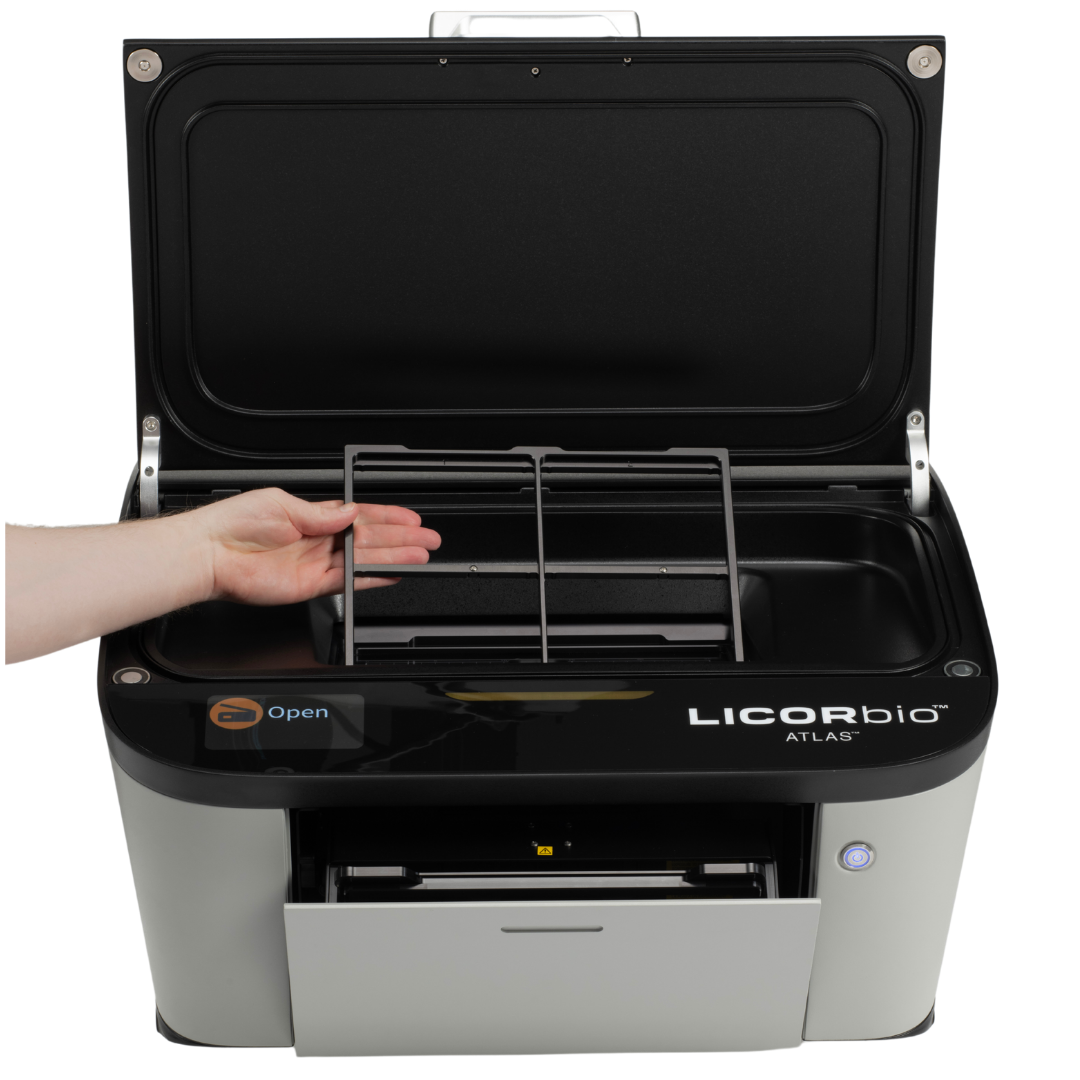
Image Studio™ Software Workflow

LICORbio 96-Well Plate Black Wall/Clear Bottom - Polystyrene Treated PN 926-19156 or 926-19157
-
Select the Plates preset.
-
Select the imaging channels.
-
Use the preset focus offset of 3.8 mm as a starting point. Before the first experimental scan, validate the focus offset using the workflow for other plate types.
-
In Scan Controls, select Scan Plate.
-
In Scan Area, select Draw New and select the plate location or locations.
-
Start the scan.
Other Plate Types—Determine the Focus Offset
-
Select the Plates preset.
-
Select one fluorescence or transillumination channel.
-
Select Focus Stack and enter these settings:
-
Air gap: The value in the plate's technical documentation
-
Focus range: Start below and end above the expected focus position, based on the air gap and the sample position within the well. Keep both values within the -1.00 mm to 5.00 mm focus offset range.
-
Step size: 0.25 mm at 50 µm resolution or 0.50 mm at 100 µm resolution
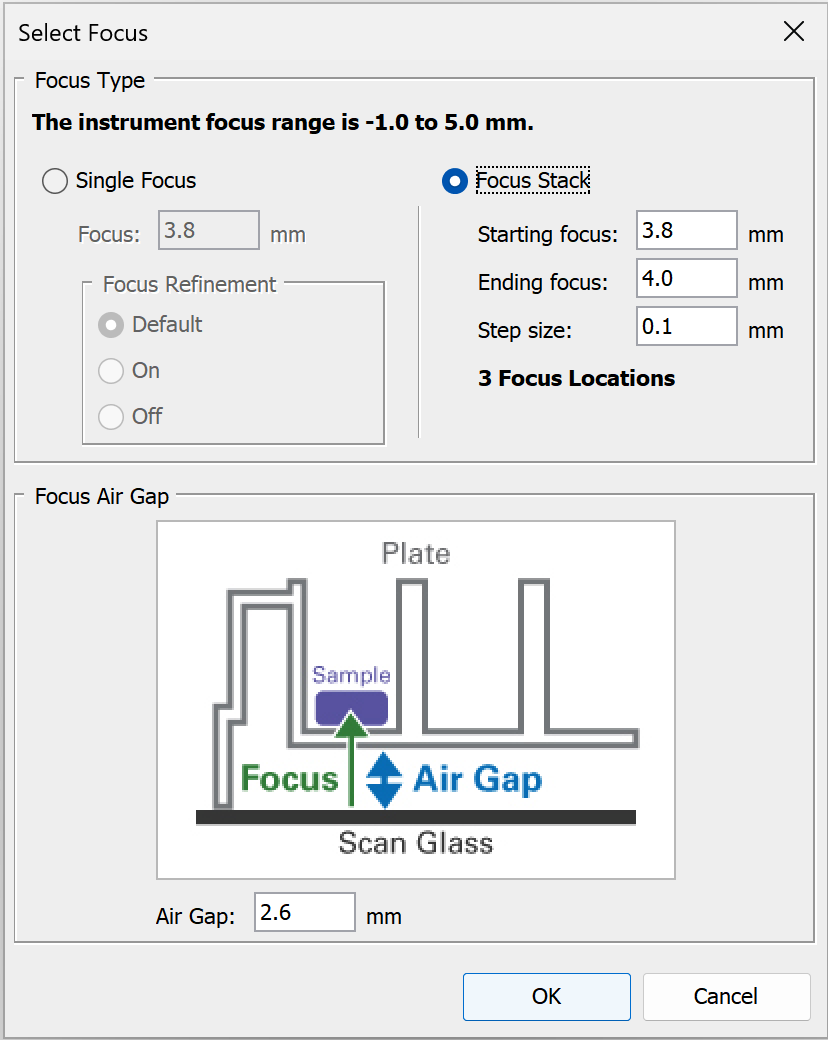
Figure 53. The Select Focus dialog for the Plate Holder. The values shown are an interface example; enter the values specified in the preceding list. 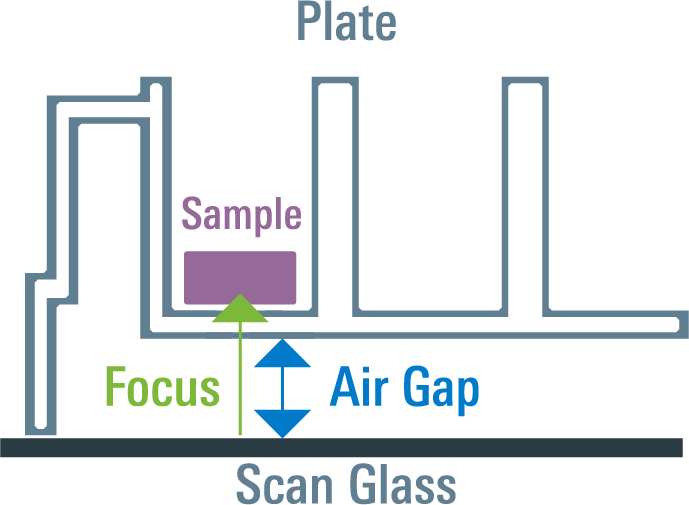
Figure 54. The air gap is the distance between the bottom of the plate and the Scan Surface. -
-
In Scan Controls, select Scan Plate.
-
In Scan Area, select Draw New and select the plate location.
-
Start the scan.
-
Compare the focal planes using linked display settings. Choose the focus offset with the highest signal-to-background ratio. If several nearby focus offsets have similar signal-to-background ratios, choose the middle offset.
-
Select Single Focus, enter the chosen focus offset, restore the imaging channels, and turn Focus Refinement off.
-
Save the settings as a preset for future experiments.
3D Samples in a Microplate (Spheroids, Organoids, MPS)
Sample Preparation
-
Use the Plate Alignment Guide.
-
Place each plate in one of the four guide positions.
-
Place luminescent assays in Position 1.
-
Ensure that each plate is fully seated and flat on all four corners in the Plate Alignment Guide.
-
Image Studio™ Software Workflow
LICORbio 96-Well ULA Plate
-
Select the Plates preset.
-
Set the imaging channel to 630 Trans.
-
Set Single Focus to 3.1 mm, turn Focus Refinement off, and set Air Gap to 2.0 mm.
-
Set the resolution to 20 µm.
-
In Scan Controls, select Scan Plate.
-
In Scan Area, select Draw New and select the plate location or locations.
-
Start the scan.
Standard ULA Plates
-
Select the Plates preset.
-
Set the imaging channel to 630 Trans.
-
Select Focus Stack and enter these settings:
-
Air gap: The value in the plate's technical documentation
-
Focus range: Start below and end above the expected focus position, based on the air gap and the sample position within the well. Keep both values within the -1.00 mm to 5.00 mm focus offset range.
-
Step size: 0.25 mm at 50 µm resolution or 0.50 mm at 100 µm resolution
Figure 57. The Select Focus dialog for the Plate Holder. The values shown are an interface example; enter the values specified in the preceding list.
Figure 58. The air gap is the distance between the bottom of the plate and the Scan Surface. -
-
Initially use the default resolution of 100 µm. Depending on the object size, you may need to use a higher resolution.
-
In Scan Controls, select Scan Plate.
-
In Scan Area, select Draw New and select the plate location or locations.
-
Start the scan.
-
Select the plane that best represents the complete 3D structure. Choose the offset at which the entire 3D sample is in focus.
-
Save the settings as a preset for future experiments.