Operation
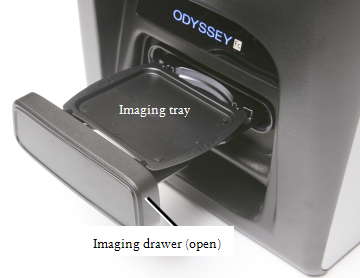
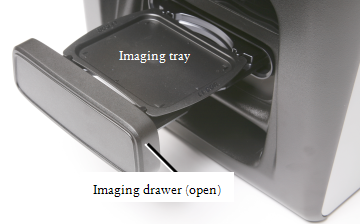
Imaging Drawer
The imaging drawer is opened and closed by pressing the large button above the drawer (see Figure 115. ).
Sample Placement
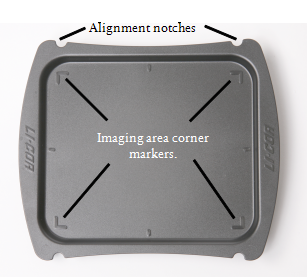
The Odyssey® XF Imaging Tray has four corner markers that delineate the edges of the Odyssey XF imaging area. Place membranes or gels up to 10 x 12 cm on the imaging tray within the corner markers for the entire membrane or gel to be imaged.
The imaging tray is designed to contain the small volume of liquid needed to keep blots or gels moist. Do not fill the imaging tray and be careful not to add so much liquid that the sloshing action created by closing the drawer may result in a spill inside the instrument.
Place membranes sample-side up with the top toward the rear of the imager.
Place gels sample-side up with the top toward the rear of the imager.
Trays can be cleaned (1), but they should be discarded if an unacceptable amount of residual signal remains on the tray after cleaning. Trays can be reordered using P/N 926-40020 (5pk).
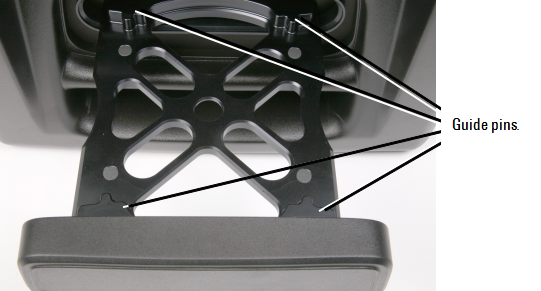
Insert Imaging Tray into Drawer
The imaging tray is inserted in the imaging drawer by aligning the notches in the tray with the guide pins in the imaging drawer (Figure 124), and lowering the tray into the drawer. Make sure the tray rests flat on the imaging drawer before pressing the open/close button to close the drawer.
Clean Tray
Trays may be discarded after use. Trays should be discarded if they are damaged or if an unacceptable level of residual signal remains after cleaning.
The following procedure may allow you to clean the tray sufficiently for reuse. If you choose to reuse the tray, it should be cleaned before and after each use.
-
Remove sample from tray.
Always handle membranes with forceps.
-
Clean tray with water and wipe with a lint-free wipe.
Do not use blue wipes.
-
Rinse with 70% ethanol or 70% isopropanol and lint-free wipes. Methanol may be used if necessary.
Do not use acetone or any other harsh solvents to clean the imaging tray.
Sticking Imaging Drawer
If the Odyssey XF imaging drawer does not open and close smoothly, contact LI‑COR technical support for instructions about acquiring the correct lubricant and correctly applying the lubricant.
Computer Connections and Networking
Note: Use only the supplied Cat. 5e RJ45 Ethernet cable to connect the Odyssey XF Imager and computer.
When Image Studio™ SoftwareLI‑COR® Acquisition Software